PROJECT
ARTIST TO INSPIRE YOU:
PROJECT OBJECTIVES
What are we learning by doing this project?
WHERE TO BEGIN:
NEXT STEPS IN ILLUSTRATOR:Take a photo of your drawing and bring into Illustrator or draw your image in illustrator
Search for and download high-resolution royalty-free stock images of textures from the stock photo sites:
STEPS IN PHOTOSHOP:OPEN your .EPS file in Photoshop
TO ADD TEXTURES TO YOUR DRAWING
TO APPLY COLOR CHANGES TO PATTERNS:
SAVE as .psd file, and .png. Remember to remove any background layer, when saving as a PNG file. This will be a flat, web version that will have a transparent background. As a group, we will combine these images into a single composition and create a habitat for your marine animals.
THINGS TO REVIEW:
Grading Rubric:
Extension Question:
- In Adobe Illustrator, using only triangles, create a specific, distinct, identifiable Marine Animal (shrimp, turtle, bass, trout, sunfish, etc.).
- Then, use Photoshop to incorporate different textures, color and shadows
(If you are unable to use Illustrator at home, you may do the project entirely in Photopea, or with a combination of the programs.)
ARTIST TO INSPIRE YOU:
- Eric Carle - https://eric-carle.com/ Children's picture book illustrator (The Very Hungry Caterpillar).
- Faith Ringgold https://www.faithringgold.com/about-faith/
- Derek Gores https://derekgores.com/
PROJECT OBJECTIVES
What are we learning by doing this project?
- Demonstrate the importance of research to good art-making --
Use appropriate visual references, but don't copy. - Less is More -- Use simple, basic shapes to make a complex thing; reduce a thing to its most essential elements.
- Stylizing and creating visual interest -- taking something recognizable and in an artistic artistic way to create interesting visuals
- Use photo-editing tools skillfully in Photoshop.
- Use Illustrator and Photoshop together to take advantage of their differences.
- Access royalty-free, high resolution images stock image sites
- Combine multiple photo files.
- Use texture and shadow to create 3-Dimensional quality.
WHERE TO BEGIN:
- Research and Collect 4-6 photographs of a specific marine animal from
different angles/viewpoints. Study how your animal looks and take notice
of your animals specific characteristics. - On paper sketch your animal on multiple times. Get to know the basic forms of the animal. Ask yourself, “What makes this animal distinctive from others?
Think of ways to stylize the animal, to make it more "designed", rather than strictly observational, while still clearly being that specific animal. - Draw a stylized version of your Marine Animal using triangles.
NEXT STEPS IN ILLUSTRATOR:Take a photo of your drawing and bring into Illustrator or draw your image in illustrator
- Open Illustrator
create document
18 width inches x 12 height inches or 12x18 if animal is tall
Resolution: 300 dpi
Color Mode: RGB
- Place your drawing to use as a guide on to a layer in Illustrator
Place embedded or drag and place
(or Photopea or freehand draw from your example.) - Lock the layer that you place the drawing ion.
- Create a new layer to draw on.
- Using the pen tool, draw your Marine Animal using only triangles.
- Make sure to close your triangles connect each point.
- click your Fill box and stroke box to select the stroke line color
- When completed, you’ll SAVE your Marine Animal as: .AI file and .EPS
file to your cloud documents and to your drive as file name: Marineanimal_yourlastname.
Search for and download high-resolution royalty-free stock images of textures from the stock photo sites:
- https://unsplash.com/ Search library of images, click image, click free download button. Multiple sizes available. Download the largest file.
- https://www.pexels.com/ Search library of images, click image, click free download button. Multiple sizes available. Download the largest file.
- https://pixabay.com/ Search library of images, click image, click free download button. Only the 640x480 image size is available.
STEPS IN PHOTOSHOP:OPEN your .EPS file in Photoshop
- Open Photoshop and Open EPS file
Resolution: 300 dpi
Image Size: 13 in x 19 in rectangle
Color Mode: RGB - Save as .PSD filename Marineanimal_yourlastname to your drive and cloud documents
- Open the texture files in Photoshop
- Place your Marine Animal and lock layer
TO ADD TEXTURES TO YOUR DRAWING
- On your LINE DRAWING, use the Magic Wand tool to select parts of your drawing, one triangle at a time.
- In the texture file, Select All, then Copy
- In the Marine file, "Paste Special -- Paste Into" do this to each triangle on your animal, one triangle at a time.
- Adjust the texture as needed once you have pasted it (Go to Edit - Transform, then Scale or Rotate. You can also move each texture within its triangle using the Move Tool (black arrowhead in your Toolbox).
TO APPLY COLOR CHANGES TO PATTERNS:
- Go to Image - Adjustments, then use:Color Balance, Hue/Saturation, and Levels (which will adjust the contrast of the image).
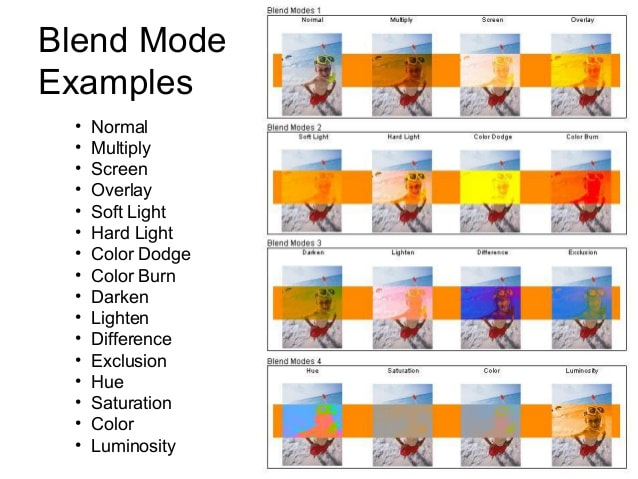
- Apply blend modes by layering colors over textures
- Using the Gradient Tool, the Burn Tool, and the Dodge Tool in Photoshop, add tonal value (lights and darks) to each triangle to create a more three-dimensional form on your animal.
SAVE as .psd file, and .png. Remember to remove any background layer, when saving as a PNG file. This will be a flat, web version that will have a transparent background. As a group, we will combine these images into a single composition and create a habitat for your marine animals.
THINGS TO REVIEW:
- Is your artwork easily identifiable as a specific type of Marine Animal?
- What makes it so, or what would make it so?
- Is it unique, artistic, and stylized; or more of a realistic representation? What could you have done to make it more stylized, more designed rather than copied?
- DID you Save your File the right size and Format
- Did you use all of the following Photoshop tools? Which do you feel you mastered? Which did you struggle with?:
- Paste Into, Color Balance, Hue/Saturation, Levels, Transform (Scale, Rotate), Move, Gradient Tool, Burn Tool, Dodge Tool.
- Do you understand how Illustrator and Photoshop differ?
- Describe some advantages of each program. Describe some of the challenges.
- Do you know why we need to use royalty-free, high resolution images?
- Did you use texture and shadow to enrich your image.
- Does your animal look three-dimensional?
Grading Rubric:
- Design (Visual Impact)
- Technical Quality
- Personal Investment
- Studio Habits of Mind
Extension Question:
- What are some possible uses for the graphic artwork you have created?
- Who might be the audience for such an image?
- Why do you say that?
- What might be added to these images to give them a specific purpose?
 RSS Feed
