For this project, you will need to bring in an old family photo. The more distressed the photo, the better (i.e. creases, chips, discoloration, fading).
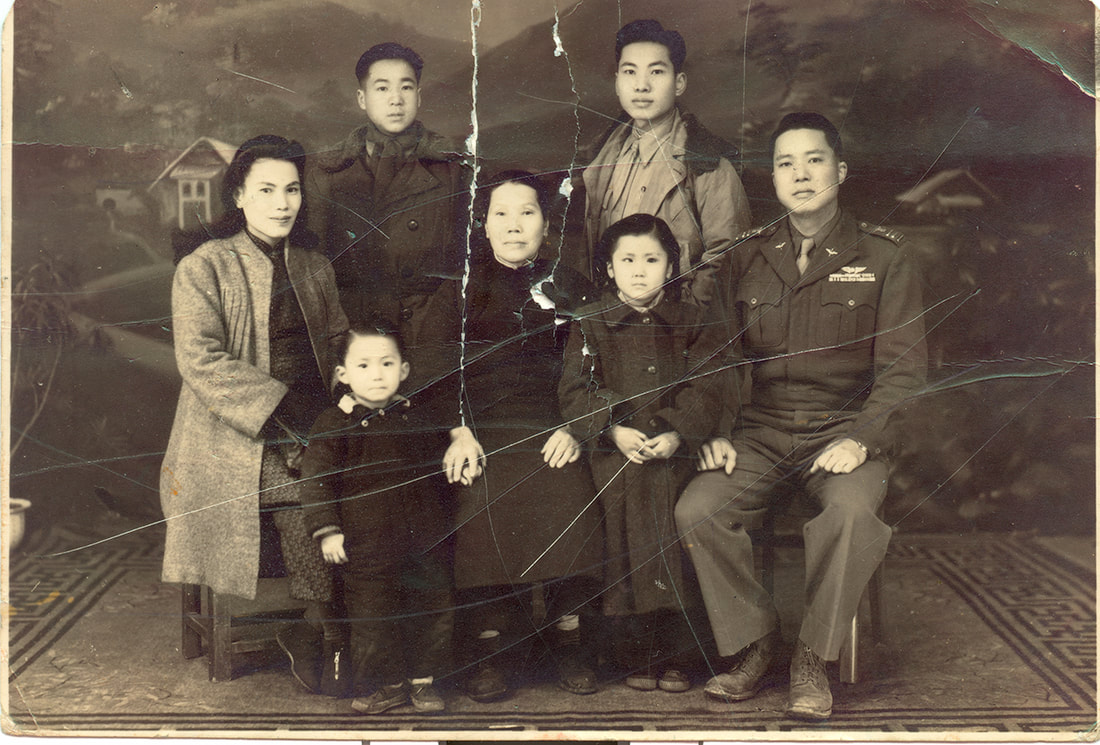
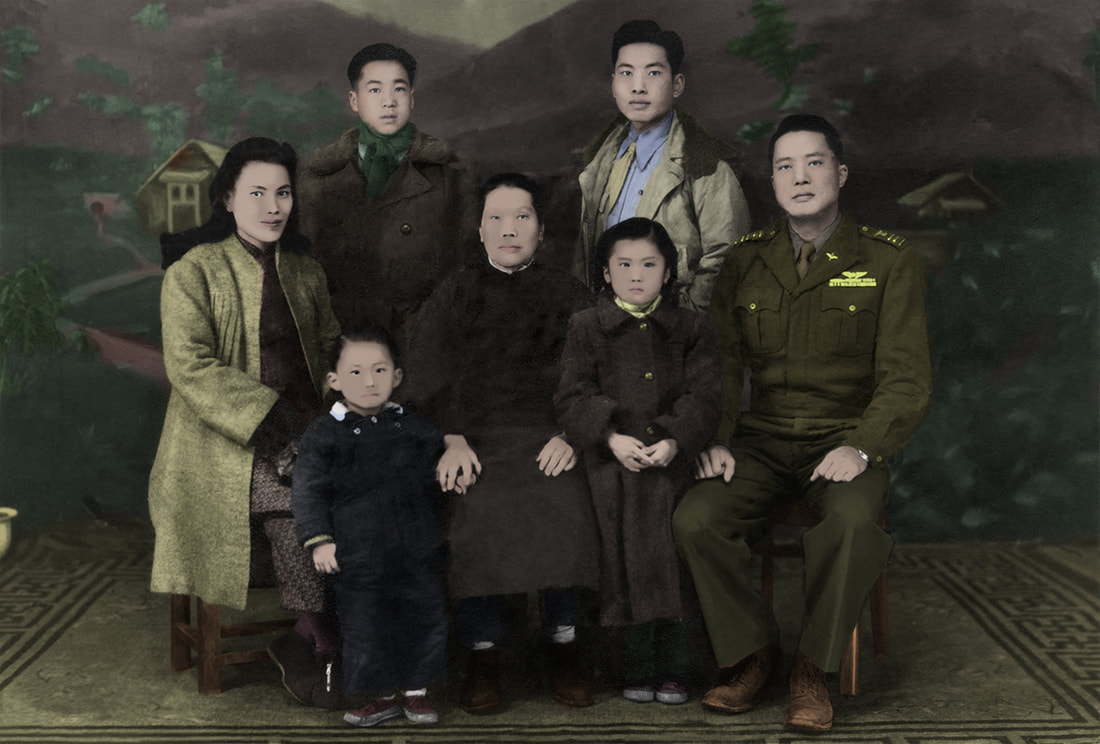
The restoration above was by Matt Chan, from an old family photo.
Due:
One week.
Project Description:
Using the clone stamp tool, paintbrushes, fills, and the multiply mode, restore an old, distressed photo to new life by removing the scars and blemishes and adding full color.
Objectives:
- Increase skills with Image Adjustments
- Improve tonal values and contrast in a photograph
- Increase skill with the clone stamp tool.
- Use the healing brush tools to fix problematic areas in a photograph
- Use the multiply mode to allow for rich, vibrant color in a black and white photograph.
- Create photorealistic color relationships.
Adobe Photoshop and/or Photopea
Format:
- At least 7 1/2 inches x 10 inches
- Resolution: Scan at 600 pixels/inch so that the artwork will eventually be 300 ppi (Important: A lower resolution will result in a printed image of poorer quality.)
- Color Mode: RGB
- If you would like to work beyond these limitations (for example: work larger than letter-size, or in a square shape) consult Mr. Ratkevich.
Steps:
- Bring in a distressed (frayed, torn, bleached, stained, creased, faded, etc.) photo.
- Scan, using the following settings
- Output Type: Millions of Colors (24 bit)
- Resolution: 600 dpi
- Open the file of the scanned image in Photoshop.
- Adjust the contrast and brightness of the image in Image - Adjustment - Levels.
- Use the clone stamp, the spot healing brush, and the healing brush to remove dust, scratches and other marks.
- Change the mode of the photo layer to Multiply.
- Create a new layer under the photo layer.
- Paint light, vibrant colors under the photo layer.
Tips:
- Scan at 600 pixels per inch or higher
- Duplicate the layer containing the original photo, so that you always have the original scan.
- The top photo layer must be set on MULTIPLY mode, at 100% opacity
- The color layers should be below that, at 100% opacity
- ALWAYS use only light, bright colors to paint (from the top left corner of the Color Picker)
Grading Criteria:
- Level of ambition in selection of photograph (How damaged is it?)
- Degree/quality of "fix" - improved values, improved contrast, removal of all unwanted marks
- Quality of painting
- Visual impact of color
 RSS Feed
