Computer Graphics
  • Current Assignments
  • Course Expectations
  • Curriculum
    • Curriculum Map
  • Resources
  • Burlington High School Art & Design Program

Current Assignments

Marine Life Habitat

11/4/2020

0 Comments

 
This will be the background used with your Marine Animal

PROJECT
To design an appropriate environment for your marine animal. Research what environment your animal lives in. Use shapes, patterns, lines and color to create
your marine animal's world. You will be using all the tools that you've been working with in Photoshop or Photopea this term.

IDEAS and INSPIRATION
  • https://www.nps.gov/subjects/oceans/ocean-habitats.htm
  • https://www.worldwildlife.org/media?habitat_id=ocean-habitat
  • https://video.nationalgeographic.com/search?q=ocean+habitiats
  • http://www.documentarymania.com/player.php
  • title=My%20Octopus%20Teacher
  • "My Octopus Teacher" on Netflix.

ARTISTS TO LOOK AT:
  • Eric Carle https://eric-carle.com/ Children's picture book illustrator (The Very Hungry Caterpillar) 
  • Faith Ringgold https://www.faithringgold.com/about-faith/
  • Derek Gores https://derekgores.com/
  • M C Escher https://mcescher.com/

PROJECT OBJECTIVE:
  • To create a strong design
  • To use Shapes -- Organic and Geometric
  • Use Repetition to create depth
  • Use Color that work in harmony- lights and darks to create tone
  • Apply Textures that create tone
  • Gradients, highlights, and shadows to create sense of light source

HOW TO BEGIN:
  1. Research what your environment (habitat) that your Marine animal would live in.
  2. Take the time to sketch out an Ideas and look at different resources
  3. Draft/sketch your habitat on paper.
  4. Collect textures and patterns to use in your environment.
    Use high-resolution images from the stock photo sites.
  5. Begin your drawing in Photoshop/Photopea
    Open Photoshop or Photopea 
    Document: 13 x19 inches or 19 x 13 inches (same direction as your animal)
    ​Resolution: 300 dpi/ppi
    Color Mode: RGB
    ​File Name: lastname_ habitat.psd
     
USE TOOLS TO DRAW YOUR environment
Experiment with new tools and try different things.
  • Pencil
  • Pen Tool 
  • Paste patterns
  • Blending Modes
  • Gradients
  • Image Adjustments (Color Balance, Hue/Saturation)
  • ​Shapes

GRADING RUBIC:
Studio Habits of Mind

REMINDERS:
  • ​Explore, be creative, try new tools
  • Designing the whole page
  • Your design should show: Movement, Depth, Texture, Color
  • Take notice of the color your animal is and the environment will be
  • USE high-resolution, royalty-free images from stock photo sites.
  • Think about where your light sources is coming 
  • CLOSE your shapes, to be able to paste your textures into them

PHOTOPEA TIP:
In Photopea (and Photoshop for iPad), there is no Paste Into.
Textures must be put on a layer UNDERNEATH the drawing, then cut to
fit the drawn shapes.
0 Comments

Stylized Marine Life Graphic: Using Illustrator and Photoshop

10/28/2020

1 Comment

 
PROJECT
  1. In Adobe Illustrator, using only triangles, create a specific, distinct, identifiable Marine Animal (shrimp, turtle, bass, trout, sunfish, etc.).
  2. Then, use Photoshop to incorporate different textures, color and shadows
    (If you are unable to use Illustrator at home, you may do the project entirely in Photopea, or with a combination of the programs.)

ARTIST TO INSPIRE YOU:
  • Eric Carle - https://eric-carle.com/ Children's picture book illustrator (The Very Hungry Caterpillar). 
  • Faith Ringgold https://www.faithringgold.com/about-faith/
  • Derek Gores https://derekgores.com/

PROJECT OBJECTIVES
What are we learning by doing this project?
  • Demonstrate the importance of research to good art-making --
    Use appropriate visual references, but don't copy.
  • Less is More -- Use simple, basic shapes to make a complex thing; reduce a thing to its most essential elements.
  • Stylizing and creating visual interest -- taking something recognizable and in an artistic artistic way to create interesting visuals
  • Use photo-editing tools skillfully in Photoshop.
  • Use Illustrator and Photoshop together to take advantage of their differences.
  • Access royalty-free, high resolution images stock image sites
  • Combine multiple photo files.
  • Use texture and shadow to create 3-Dimensional quality.

WHERE TO BEGIN:
  • Research and Collect 4-6 photographs of a specific marine animal from
    different angles/viewpoints. Study how your animal looks and take notice
    of your animals specific characteristics.
  • On paper sketch your animal on multiple times. Get to know the basic forms of the animal. Ask yourself, “What makes this animal distinctive from others? 
    Think of ways to stylize the animal, to make it more "designed", rather than strictly observational, while still clearly being that specific animal.
  • Draw a stylized version of your Marine Animal using triangles.

NEXT STEPS IN ILLUSTRATOR:Take a photo of your drawing and bring into Illustrator or draw your image in illustrator 
  • Open Illustrator
    create document

    18 width inches x 12 height inches or 12x18 if animal is tall
    Resolution: 300 dpi
    Color Mode: RGB
  1. Place your drawing to use as a guide on to a layer in Illustrator
    Place embedded or drag and place
    (or Photopea or freehand draw from your example.)
  2. Lock the layer that you place the drawing ion.
  3. Create a new layer to draw on.
  4. Using the pen tool, draw your Marine Animal using only triangles. 
  5. Make sure to close your triangles connect each point.
  6. click your Fill box and stroke box to select the stroke line color
  7. When completed, you’ll SAVE your Marine Animal as: .AI file and .EPS
    file to your cloud documents and to your drive as file name: Marineanimal_yourlastname.


BEFORE YOU CAN GO INTO PHOTOSHOP:
Search for and download high-resolution royalty-free stock images of textures from the stock photo sites:
  • https://unsplash.com/ Search library of images, click image, click free download button. Multiple sizes available. Download the largest file.​
  • https://www.pexels.com/ Search library of images, click image, click free download button. Multiple sizes available. Download the largest file.
  • https://pixabay.com/ Search library of images, click image, click free download button. Only the 640x480 image size is available.​

STEPS IN PHOTOSHOP:OPEN your .EPS file in Photoshop
  1. Open Photoshop and Open EPS file​
    Resolution: 300 dpi
    Image Size: 13 in x 19 in rectangle
    Color Mode: RGB
  2. ​Save as .PSD filename Marineanimal_yourlastname to your drive and cloud documents
  3. Open the texture files in Photoshop
  4. ​Place your Marine Animal and lock layer

TO ADD TEXTURES TO YOUR DRAWING 
  1. On your LINE DRAWING, use the Magic Wand tool to select parts of your drawing, one triangle at a time.
  2. In the texture file, Select All, then Copy
  3. In the Marine file, "Paste Special -- Paste Into" do this to each triangle on your animal, one triangle at a time.
  4. Adjust the texture as needed once you have pasted it (Go to Edit - Transform, then Scale or Rotate. You can also move each texture within its triangle using the Move Tool (black arrowhead in your Toolbox).

TO APPLY COLOR CHANGES TO PATTERNS:
  1. Go to Image - Adjustments, then use:Color Balance, Hue/Saturation, and Levels (which will adjust the contrast of the image).
  2. Apply blend modes by layering colors over textures
  3. Using the Gradient Tool, the Burn Tool, and the Dodge Tool in Photoshop, add tonal value (lights and darks) to each triangle to create a more three-dimensional form on your animal.

SAVE as .psd file, and .png. Remember to remove any background layer, when saving as a PNG file. This will be a flat, web version that will have a transparent background. As a group, we will combine these images into a single composition and create a habitat for your marine animals.

THINGS TO REVIEW:
  • Is your artwork easily identifiable as a specific type of Marine Animal?
  • What makes it so, or what would make it so?
  • Is it unique, artistic, and stylized; or more of a realistic representation? What could you have done to make it more stylized, more designed rather than copied?
  • DID you Save your File the right size and Format
  • Did you use all of the following Photoshop tools? Which do you feel you mastered? Which did you struggle with?:
  • Paste Into, Color Balance, Hue/Saturation, Levels, Transform (Scale, Rotate), Move, Gradient Tool, Burn Tool, Dodge Tool.
  • Do you understand how Illustrator and Photoshop differ?
  • Describe some advantages of each program. Describe some of the challenges.
  • Do you know why we need to use royalty-free, high resolution images? 
  • Did you use texture and shadow to enrich your image.
  • Does your animal look three-dimensional?

Grading Rubric:
  • Design (Visual Impact)
  • Technical Quality
  • Personal Investment
  • Studio Habits of Mind 
 ​
Extension Question:
  • What are some possible uses for the graphic artwork you have created?
  • Who might be the audience for such an image?
  • Why do you say that?
  • What might be added to these images to give them a specific purpose?
1 Comment

Animated GIF

10/26/2020

0 Comments

 
Picture
PROJECT
Using either Photopea or Photoshop, create an animated .GIF from 2 of your Kaleidoscopes. 

VIDEO TUTORIALS:
  • Creating an Animated GIF in Photoshop
  • Creating an Animated GIF in Photopea
​
PROCESS:
First save 2 of your Kaleidoscopes as .jpgs and place them on your drive.

TO CREATE .GIF in PHOTOSHOP:
  1. Open Photoshop
  2. Create new document 
    Name: Animated_Kaleidoscope
    Size: 1000 pixels width x 1000 pixels height |
    DPI: 150 dpi 
    Background: transparent
  3. File> Place Embedded (Select your Kaleidoscope that you saved as .jpg)
  4. Repeat  File> Place Embedded (to add your 2nd Kaleidoscope .jpg)
  5. OPEN Window>Timeline
  6. In the Timeline Window > Select > Create from Animation
  7. Select Timeline Menu ( 3 lines, locate on the side of Timeline Window)
  8. Select Make Frames from Layers
  9. Set the Time on each frame (.5 second on each frame)
  10. File Export> Save for Web (Legacy) 
  11. Select .GIF - Adaptive - SAVE

TO CREATE .GIF in PHOTOPEA
  1. Open Photopea
  2. Create new document 
    Name: Animated_Kaleidoscope
    Size: 1000 pixels width x 1000 pixels height 
    DPI: 150 dpi 
    Background: Transparent
  3. Open & Place > Select your Kaleidoscope that you saved as .jpg
  4. Repeat  Open & Place > Select your 2nd Kaleidoscope  .jpg
  5. add _a_ to the beginning of each layer name, by double clicking layer
  6. Export as > .GIF
  7. Format .GiF
    Size: 1000 pixels width x 1000 pixels height 
    Quality: 100%
    Speed: 32% ( or faster if you prefer)
    Repeat: 0
    SAVE

0 Comments

Stock Photo Sites

10/22/2020

0 Comments

 
​Free Stock Photo Sites:
Search library of images, click image, click free download button.
​Multiple sizes available. Download the largest file. 


https://unsplash.com/ 

https://www.pexels.com/ 

https://pixabay.com/ 


0 Comments

Kaleidoscope: Abstract Photo Design

10/14/2020

0 Comments

 
Picture
Picture
PROJECT:
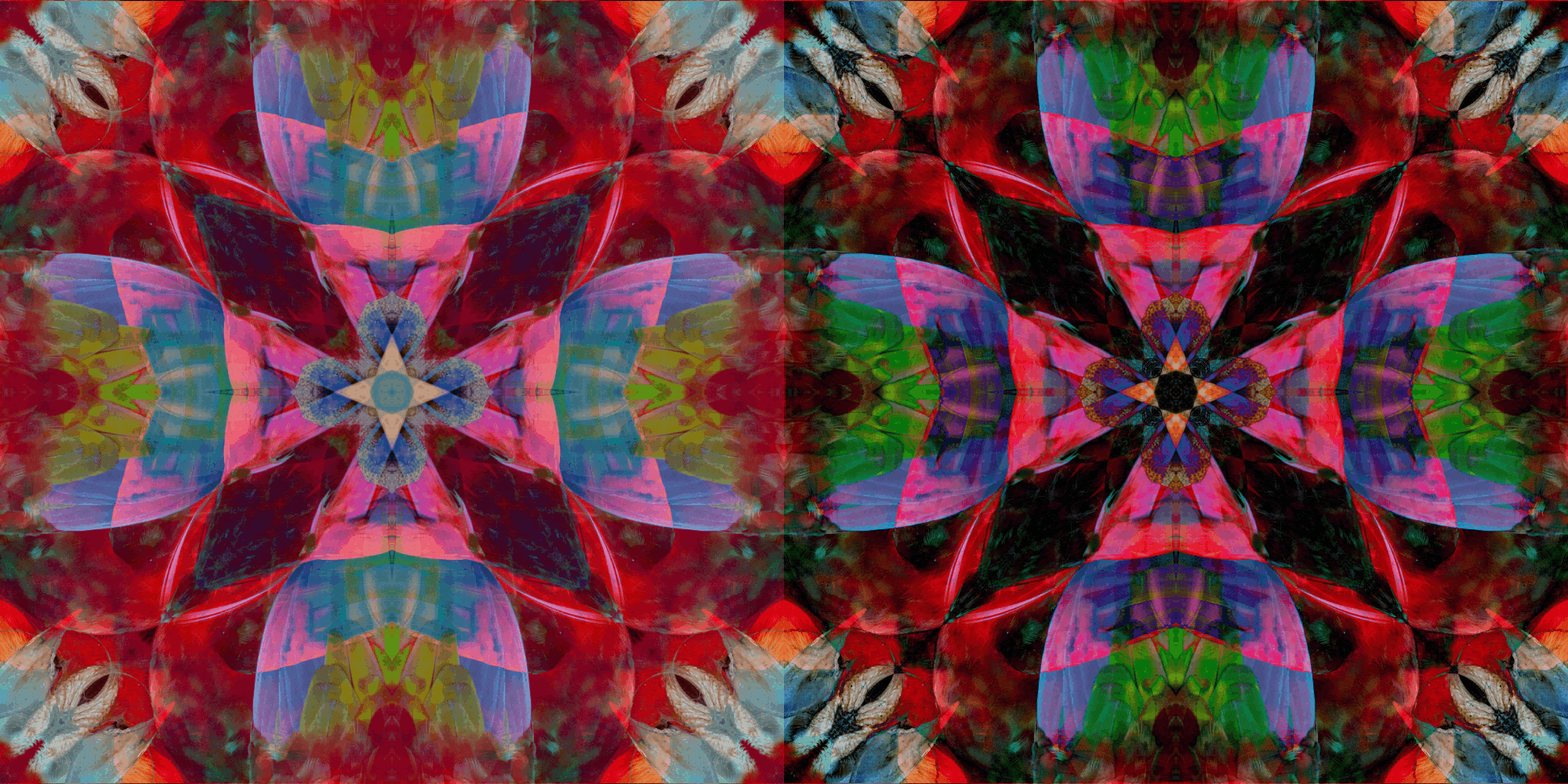
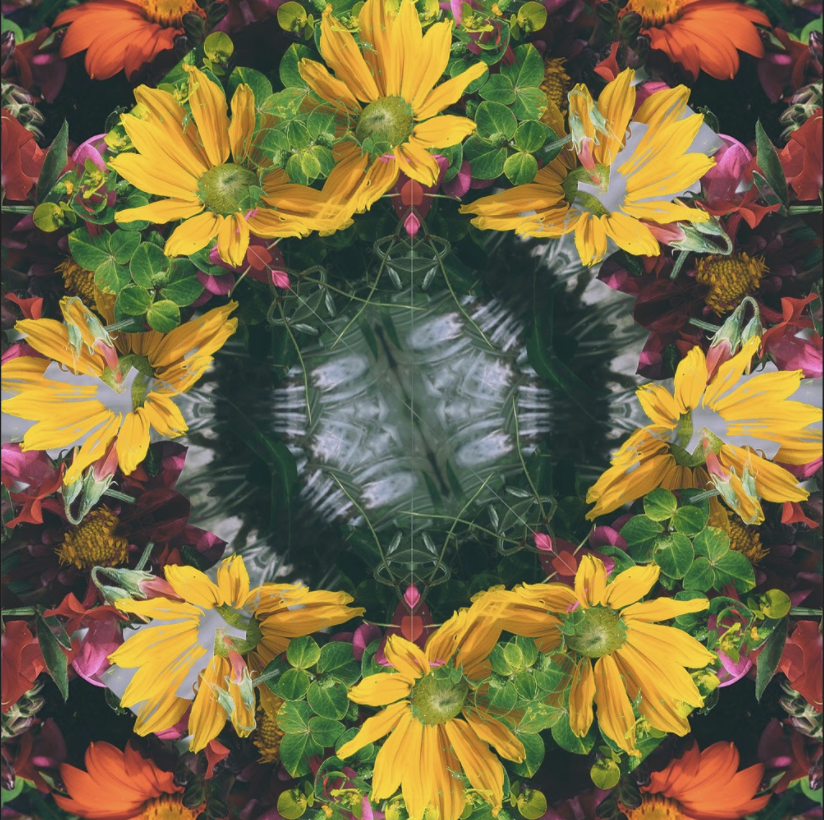
Create two Kaleidoscope designs from two different images.
You may use either Photoshop or Photopea.

Project Objectives:
  • Use tools to crop, transform, and rotate to create their designs.
  • Use multiple reflections, flipping, rotating, and mirroring the same image repeatedly to create a Kaleidoscope pattern.
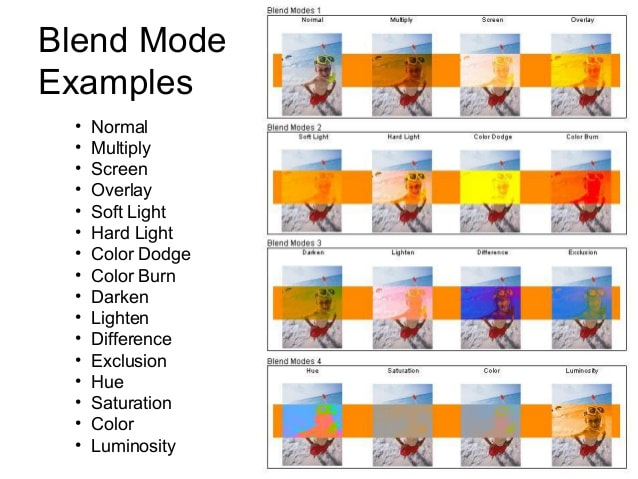
  • Apply and experiment with layer blend modes to see how different blend modes can affect and change visuals in Photoshop.

SLIDESHOW ARTISTS TO EXPLORE:
Master Artists' Abstract Designs (Slideshow)

VIDEO TUTORIAL:
Kaleidoscope Tutorial (Video)

​
BEFORE YOU CREATE YOUR KALEIDOSCOPES
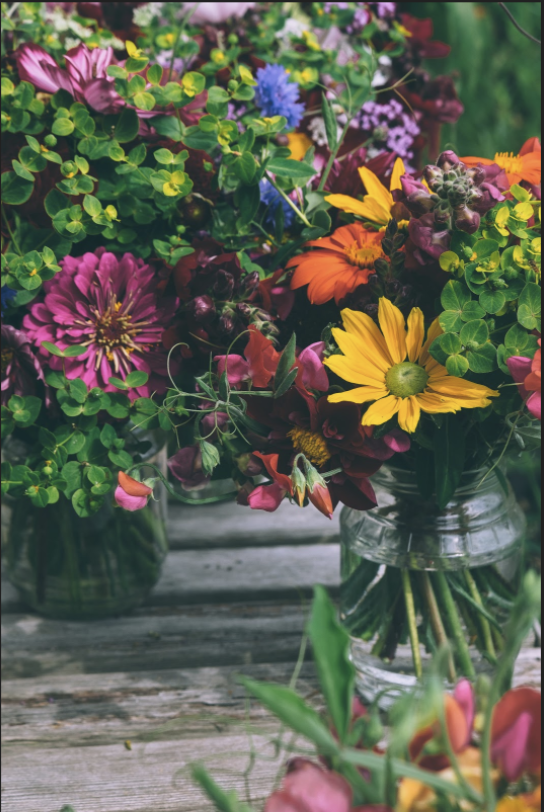
  • SELECT COLOR DETAILED HIGH RESOLUTION PHOTOS.
  • AT LEAST 300 DPI

STEPS TO CREATE YOUR KALEIDOSCOPES
  1. ​Open your photo in Photoshop/Photopea.
  2. Use the crop tool eliminate any non-detailed areas from your photo
    you want to crop the photo to a very small area that has alot of detail.
    You should really see the original image any longer.
  3. SAVE cloud document- Last name_Kaleidoscope.psd

EXTEND CANVAS, ROTATE, FLIP, DUPLICATE ​
  1. EXTEND CANVAS Go to image> canvas size In the canvas window change size to Width 200 percent - Height 100 percent keep relative box unchecked Anchor box move points to the left middlebox. Hit Ok. This will expand the page size to allow the image to be flipped and rotated again.
  2. Duplicate image layer  menu > layer > duplicate layer
  3. Select the move tool, Hold down the shift key and drag the Background copy image to the right to fill the open area.
  4. While on the background copy layer -- Go to Menu > Edit> Transform>Flip Horizontal. You've created a mirror reflection of the image to the right.
  • Hold down the option key and Go to Menu > Layer > Merge Visible this will create a third layer joining the background images. SAVE FILE

EXTEND CANVAS, ROTATE, FLIP, DUPLICATE 
  1. Go to image> canvas size In the canvas window, change the size to Width 100 percent - Height 200 percent - keep the relative box unchecked in the anchor box move point to the top middlebox. Hit Ok. This will expand the page size to allow the image to be flipped and rotated again.
  2. Duplicate Layer 1 image layer (dragging image layer onto a new layer icon or go to menu > layer > duplicate layer
  3. Select the move tool, Hold down the shift key and drag the Layer 1 copy image to the white below to fill the open area on the bottom of the page. SAVE FILE
  4. While selecting Layer 1 Go to Menu > Edit> Transform> Flip Vertical You created another mirror reflection on the bottom of the page.
  5. Selecting Layer 1 copy Go to Menu > Layer> Merge Down this wlll join the background images.
  6. Duplicate Layer 1 image layer (dragging image layer onto a new layer icon or go to menu > layer > duplicate layer
  7. While on Layer 1 copy Go to Menu >Select > All Go to Menu > Edit > Transform > Rotate 90 Clockwise

CROP DOWN THE IMAGE
  • Hold down the command key and double click on layer thumbnail this will select the image - Go to Menu >Image>Crop this will give us a square-shaped image

SAVING THE FILE TO THE RIGHT SIZE 
  • File> Image Size Change Image box details to
  • Resolution 150 --
  • Width 1000 pixels -- Height 1000 pixels
  • SAVE FILE

APPLY THE EFFECT:
​Applying Blending Modes: SEE Examples of blend modes below
Picture
Save as .PSD and .JPG and turn Classroom - Turn in the original photo with the final Kaleidoscope .jpg file. Have fun exploring the blend modes.

Grading Criteria: General Art Rubric

0 Comments

Digital Drawing/Painting: “Growth”

9/20/2020

0 Comments

 
Assignment:
Using the brush and paint tools of Photopea, create an artwork that visually expresses the idea of Growth. It will start as a photocollage of at least three photos, which you will then trace.

Objectives:
Develop your skills with the following tools:
  • Brush tool
  • Eraser
  • Paint bucket
  • Layers

Requirements:
  • 8.5” x 11” - “Letter” sized document, either horizontal ("landscape" orientation) or vertical ("portrait" orientation)
  • Filename: growth yourlastname.psd
  • Save to: Google Drive
  • Must combine at least three photographs
  • Must fill the page
  • Must use at least ten different colors
  • Must use each of the tools listed above

Steps:
  1. FIRST, if you haven't already done so, create a Google Drive folder entitled “Computer Graphics I yourlastname”. This is where you'll save all your in-progress work every day.
  2. Go to photopea.com to access the program.
  3. Go to New File
  4. Set the proper dimensions (8.5” x 11”), resolution (300 dpi), and click "Create".
  5. Save immediately as filename “growth yourlastname.psd”.
  6. Collect at least three digital photos to make a photocollage about "growth".
  7. File-Open each of the photographs in Photopea, then Select All, copy and paste each into the "Growth" PSD.
  8. Resize, move, and transform the photos in the "growth" file.
  9. When you like the placement, lock each of the photograph layers in the Layers palette.
  10. Use the brush tool to trace parts of the photographs. Use different paintbrush thicknesses and colors. Make as many closed shapes as possible, so that you can fill in the shapes with the paint bucket tool. 
  11. Save regularly (every few minutes) as a PSD. Save over your older version when asked.
  12. At the end of every session, place the file in your Google Drive “Computer Graphics I yourlastname” folder
  13. At the end of every session, turn in a JPG or screenshot of your progress via Google Classroom as an "Exit Ticket"
  14. When completed, Save as a PSD and Export the image as a JPG; then share the final PSD file and the JPG with Mr. Ratkevich.

Trouble?:
If you run into difficulty while working remotely, you can always refer to the following resources:
  • Watch this 20 minute YouTube video tutorial on Photopea for Beginners: https://youtu.be/4pfdGEnFtUU
  • Check the helpful hints in getting started with the program on this page: https://www.photopea.com/learn/

Grading Criteria
  • Creativity
  • Content (Development and communication of ideas)
  • Design
  • Technical Quality (“Finished”)
  • Studio Work Habits

As the assessment tool, we will be using the Studio Habits of Mind rubric.
Rubric: Art Studio Habits of Mind

---------------------

Photopea

Photopea is a full-fledged graphics and photo editor that works with Photoshop, GIMP, and Sketch file formats.  It supports layers, raster & vector graphics, and a full suite of editing tools.

There is no iPad app for Photopea. You can use it in Safari by going to Photopea.com

The free version does have ads, but students don’t need to have an account to use Photopea. 

When Photopea is used on a Chromebook, you can open and save directly to Google Drive.
0 Comments
Forward>>

    Author

    Write something about yourself. No need to be fancy, just an overview.

    Archives

    May 2021
    April 2021
    March 2021
    February 2021
    January 2021
    December 2020
    November 2020
    October 2020
    September 2020

    Categories

    All

    RSS Feed

Powered by Create your own unique website with customizable templates.